Gazebo design
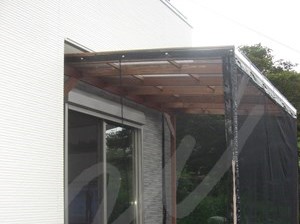
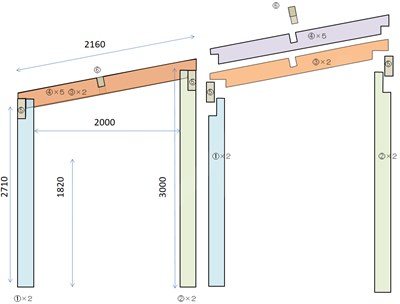
I wanted a place to relax in my copse garden and made a gazebo. First of all, draw a conceptual drawing. I thought of the figure when viewed from the side like the figure below. Since the material used is “Yellow Balau”, which has high outdoor durability, the structure is made of wood in consideration of the heavy weight of the wood, making it easy to assemble. I have written detailed drawings for each part, but I will omit them here.
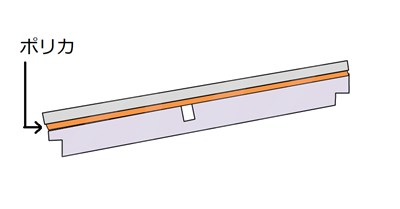
Roof structure
Use polycarbonate for the roof. This “polycarbonate” has the property of expanding with heat, so if you fix it with screws, the polycarbonate will be deformed by heat. Therefore, the roof of the gazebo has a structure in which a polycarbonate is sandwiched. More specifically, place a polycarbonate on the roofing material of ④ in the above figure, and sandwich the polycarbonate with a thin part (the orange part in the figure below) to fix it. When sandwiched, it is waterproofed via a rubber sheet. The screw (screw) should be struck between the polycarbonates so that they are sandwiched.


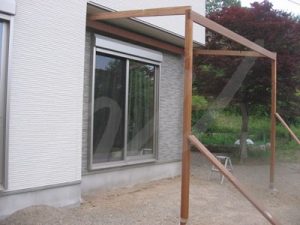
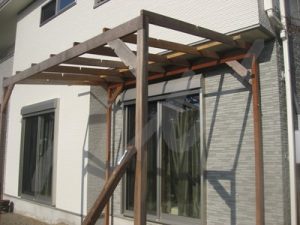
Assembling the gazebo
After processing each part, first build the foundation, assemble the basic frame, and then put the roof.

Handmade a mosquito net additional
Since mosquitoes cannot come to the gazebo, I made a mosquito net. It is fixed with metal fittings, and zippers are attached to the corners.
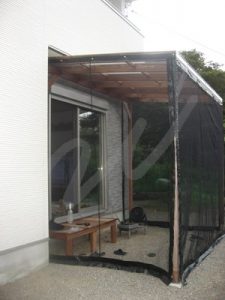
At the same time, I made a bench, so it is easy to use. Even if it’s a hot summer day, we can enjoy the breeze cooling here in the evening, and it’s comfortable without mosquitoes. Now that we have a good space, we can eat and work here. It might have been more comfortable if it was wider. Moreover, putting on and taking off the mosquito net is a little troublesome, so I would like to devise it. But I am generally satisfied.